I call this pantry pasta because it is made with ingredients that I always have in my pantry and refrigerator. As soon as one of the ingredients gets low, they go right onto the shopping list to make sure I have them in the house.
The recipe is less structured than my other recipes (and those don’t tend to have much structure!) There are no ingredient quantities because it works for any amount of pasta and each ingredient can be adjusted to personal taste. It is more of a process for making a simple pasta than a specific pasta recipe. And at the end there will be a bunch of ways to embellish the pasta.
Recipe Notes:
You can use almost any type of pasta for this recipe. The only things that I would avoid are tubes, shells, and really thick pastas. You want the butter, oil, and cheese to coat the pasta, and that is difficult with those shapes.
We almost always use Tinkyada organic brown rice pasta, because their pasta has the best texture (non-mushy) of any rice pasta that we have tried. Their spaghetti and spirals are our go to shapes.
You will need pot to cook the pasta in and a large frying pan to finish the pasta assembly. My four quart fry pan is large enough to boil pasta for three, so I use it for both the pasta boiling and the assembly (one less pot to clean!)
Garlic granules have a courser texture than garlic powder. I prefer the texture and taste of granules, but if you only have garlic powder in your pantry it will work too. Just make sure it is just garlic, no additional fillers or anti-clumping agents.
When adjusting the spices to taste, be sure to not make the pasta taste salty. You want the salt to brighten the flavor but not be the flavor.
Ingredients:
Pasta (I find 6oz is good for two servings)
Butter
Olive oil
Garlic granules
Dried basil
Dried oregano
Salt and pepper
Fresh Parmigiano-Reggiano cheese (a good quality parmesan cheese works too)
Instructions:
Cooking the pasta:
Boil enough water to easily cover the amount of pasta you are cooking.
Add the pasta to the boiling water. Stir the pasta immediately to keep the pasta from sticking to itself. Stir the pasta another 2-3 times in the first 2 minutes of cooking. This should keep the pasta from sticking through the rest of the cooking time.
Cook the pasta until just slightly under done. (The pasta container should give suggested cooking time). When you bite into a piece there should be good resistance, but you do not want to feel a “hard” center.
Pour the pasta and water into a colander to drain the pasta. Do not rinse.
The drained pasta will continue to cook (the reason for the slightly under done) so you want to assemble the pasta fairly quickly.
Assemble the pasta:
(If you are making a lot of pasta you may need assemble the pasta in batches, repeating the following steps for each batch).
Heat a pan over medium heat (or use the one you boiled the pasta in).
Add butter and olive oil in a 2:1 ratio and melt the butter. Remove from the heat when the butter is melted. The olive oil should keep the butter from burning. (I do about 1.5 tablespoons butter for 6 to 8 ounces of dry pasta).
Place pasta in the pan on top of the butter and oil mixture and spread into an even layer on the bottom of the pan.
Sprinkle a pinch of salt and a pinch of pepper over the pasta.
Sprinkle garlic granules evenly over the pasta.
Cup your non-dominant hand upwards and pour dried basil into the palm of your hand, filling the depression in the center of your palm. With your opposite thumb, crush the basil with a forwards and backwards motion. This helps release the oils and flavor of the dried spice. Sprinkle it over the pasta.
Repeat this process with the dried oregano.
Toss the pasta in the oil and spices to get evenly coated. I like to use chopsticks, but you can use tongs, forks, or anything else that won’t break the pasta. If the pasta is a little dry for your taste add a little more olive oil and toss again.
Taste a piece of pasta to determine if you need to add more of any of the spices. (After you have made the recipe a few times you will get to know the amounts you prefer, and will even be able to tell by sight).
Grate a generous amount of Parmigiano-Reggiano evenly over the pasta. Toss the pasta again and taste. Add more cheese if desired. The residual heat of the pasta and the pan should slightly melt the cheese.
Additional Notes:
To this basic pasta you can easily add almost anything. If your additions are time consuming, you might want to prepare them while the pasta is cooking. If they are quick and you want to use your boiling pan, just do the additions after you have drained the pasta. Here are a few suggestions:
Add some heat: Add some chili flakes to the butter and oil mixture before adding in the pasta. You will want to heat and stir the chili flakes for a few seconds so the chili flavor will be absorbed into the oil. Remove from heat then assemble the pasta as normal.
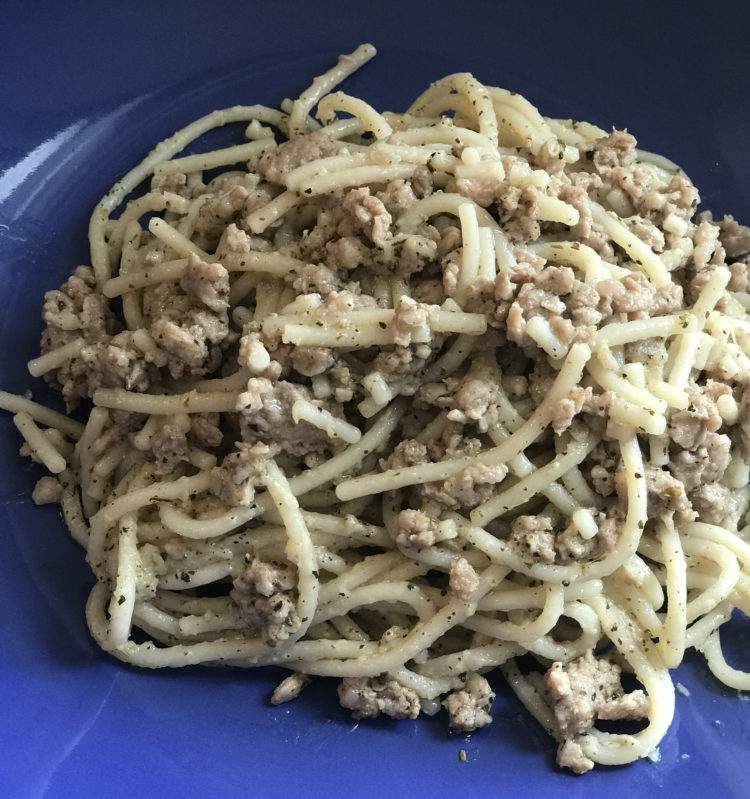
Add some meat: Cook ground meat (or bite sized pieces of meat) in the butter and oil mixture until fully cooked and broken into the sizes you prefer. With pork or beef, you will probably want to use a little less butter and oil because the meat will add additional fat to the mixture, but the added fat also adds a lot of flavor. One of my favorite things to do is use Italian sausage (removed from the casing) as my ground meat. Remove from heat then assemble the pasta as normal.
Add some fresh cherry or grape tomatoes: Cut the tomatoes in half lengthwise. Add them to the butter and oil. Sprinkle with salt and pepper. Cook on medium high heat while stirring. You want the tomatoes to cook through (the color will darken and the edges of the skin will start to slightly curl). Remove from heat then assemble the pasta as normal.
Add mushrooms: Add sliced mushrooms to the butter and oil mixture. Cook on medium high heat while stirring occasionally. The mushrooms will shrink a lot and give off a lot of moisture. Continue cooking until almost all of the liquid has evaporated, leaving only mushrooms and oil. Remove from heat then assemble the pasta as normal.
With these additions you will probably have to plate your pasta a little differently. After assembly, all the extra additions usually migrate to the sides of the pan with the pasta in the middle. Since the extras have given their flavors to the butter and olive oil, the flavors have already coated the pasta. Just plate mostly pasta first, and then scoop the goodies on top.